As educators, we are always told to differentiate. As teachers, we want to do what is best for our students. But often times it can be overwhelming. How can I reach all of my students? I have students on grade level, above grade level, and far below grade level. This year, I have found the perfect balance. This post will go into details on differentiating made simple with math menus!
Step 1 – Diagnostic
The first step is you need to do some type of diagnostic. At my school, we do iready as well as STAR. I find the STAR is more comprehensive, and also allows you to sort students into groups based on their scores.
Step 2 – Groupings
After I sort the students based on their scores, you can find the standards, and the focus standards, that those students need to work on. As I make my menus every week, I look at the focus standards and pick the ones that most pertain to our current unit. For example, we are currently multiplying and dividing fractions. But I have students who can not identify that a square with 4 pieces and 3 of them colored in represents 3/4. So I put them into 3 groups based on their scores in standards that mostly support our current unit.
Step 3 – Differentiating Menus
I currently have 3 groups in each of my classes – strawberries, apples, and pineapples. I am very clear that there is no “high” and “low” group. The groups are based on what they need most when it comes to fractions. If you are a strawberry this unit, you might be a strawberry next unit, but you might also be an apple. It all depends on your skills on the prerequisites for that unit. My math menus are a mixture of the following things:
-Workbook pages from our curriculum
-Teacher assigned iready lessons
-iready path lessons
-Teacher assigned activities (computer and paper based)
-Meeting with the teacher
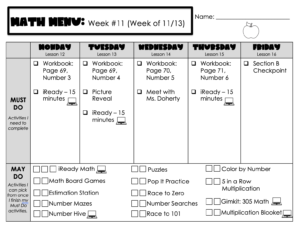
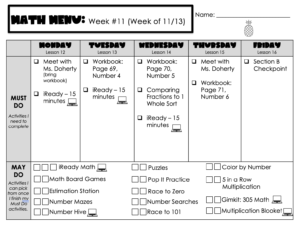
Here are some examples of my different math menus from a previous week.
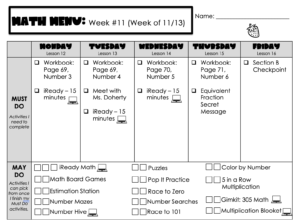
-Strawberries – highest group, meets with me once a week, works on thin sliced problems
-Apples – middle group, meets with me 1-2 times per week, works on thin sliced problems
-Pineapples – lowest group, meets with me 2-3 times per week, works on a workbook page together once to start the week off the strong, followed by thin sliced problems the next time, and remediation the third time
Step 4: Keeping Track of Everything
I have a tracker in google sheets that I use to keep track of everything. It lists the students in each group, the week, and the corresponding iready lesson and activity that I give them. This allows me to keep track of everything I am doing. I also keep track of everything using one of my trackers so I know when students complete a task. Click Menu Work Tracker Example to download an editable version for free!
Does this sound like something that would improve your classroom? Differentiating made simple using math menus can be something that changes your classroom! My classroom runs itself during menu time, and I wouldn’t change it for the world. Make sure that you are on the waitlist for when Math Menus: The Course opens up again soon!








5 thoughts on “Differentiating Made Simple with Math Menus”
Hello
My school is currently using iready math which is taught whole group. How do you incorporate math menus into this type of program where most of the math time is whole and use the workbook as the main learning tool during teacher led instruction?
I teach 2nd grade.
Thank yoi
My curriculum is whole group as well. We do the whole group lesson (which includes workbook) then after that we have menu time, which includes workbook pages and spiraled activities I create.
Hello! I was wondering how long you have for your math block each day! Thanks 🙂
This year we had 90 minutes, but I have used menus with classes as short as 55 minutes.